Creating Your Agent
Building an agent is like setting up a new hire on their first day: you give them a name and a role, hand them the tools and knowledge they need, and decide where they'll work. The agent builder puts all of that on a single screen, split into three areas you fill in at your own pace. Nothing here happens in a rigid order — you can jump between sections, and your work saves as you go.
When you open the builder for a new agent, most sections are locked until you save the basics. Once your agent has an identity, the rest unlocks and you can fill it in as fully — or as lightly — as you need.
The three areas
The whole builder is organized around three questions, shown left to right across the screen.
| Area | The question it answers | What you set here |
|---|---|---|
| 1 · Identity | Who is it? | The agent's name, description, avatar, conversation starters, and instructions |
| 2 · Capabilities | What can it do? | Custom tools, knowledge, databases, and skills |
| 3 · Deployment | Where does it live? | The AI model that powers it and the channels it answers on |
You don't have to fill in every area. A simple chatbot might only need an identity and a channel; a research agent might lean heavily on capabilities. Add what the job calls for.
Identity — who it is
The left column is where your agent becomes recognizable. You give it a name and description, pick an avatar, add a few conversation starters to suggest what people can ask, and write the instructions that shape its personality and the rules it follows.
This is the one area you fill in first — saving the profile is what creates the agent and unlocks everything else.
Capabilities — what it can do
The center column is where you give your agent its reach beyond plain conversation:
- Custom tools — actions it can take in other apps, like sending a message or creating a record
- Knowledge — extra background you give the agent for context: files and URLs it can read and cite
- Databases — your own tables it can read from and write to
- Skills — reusable abilities for advanced tasks, and a way to keep its work consistent — like standardizing how it answers or polishing the quality of its replies
Every agent also comes with built-in capabilities shown along the bottom of the screen — memory, reading, and a set of system tools — so it can do a lot before you add anything at all.
Deployment — where it lives
The right column decides how your agent reaches people. You pick the AI model that powers it — a balanced one or a faster, lighter one — and connect the channels it answers on: Instagram, WhatsApp, Messenger, Telegram, Slack, Discord, Teams, your website, a chatbot widget, or the API.
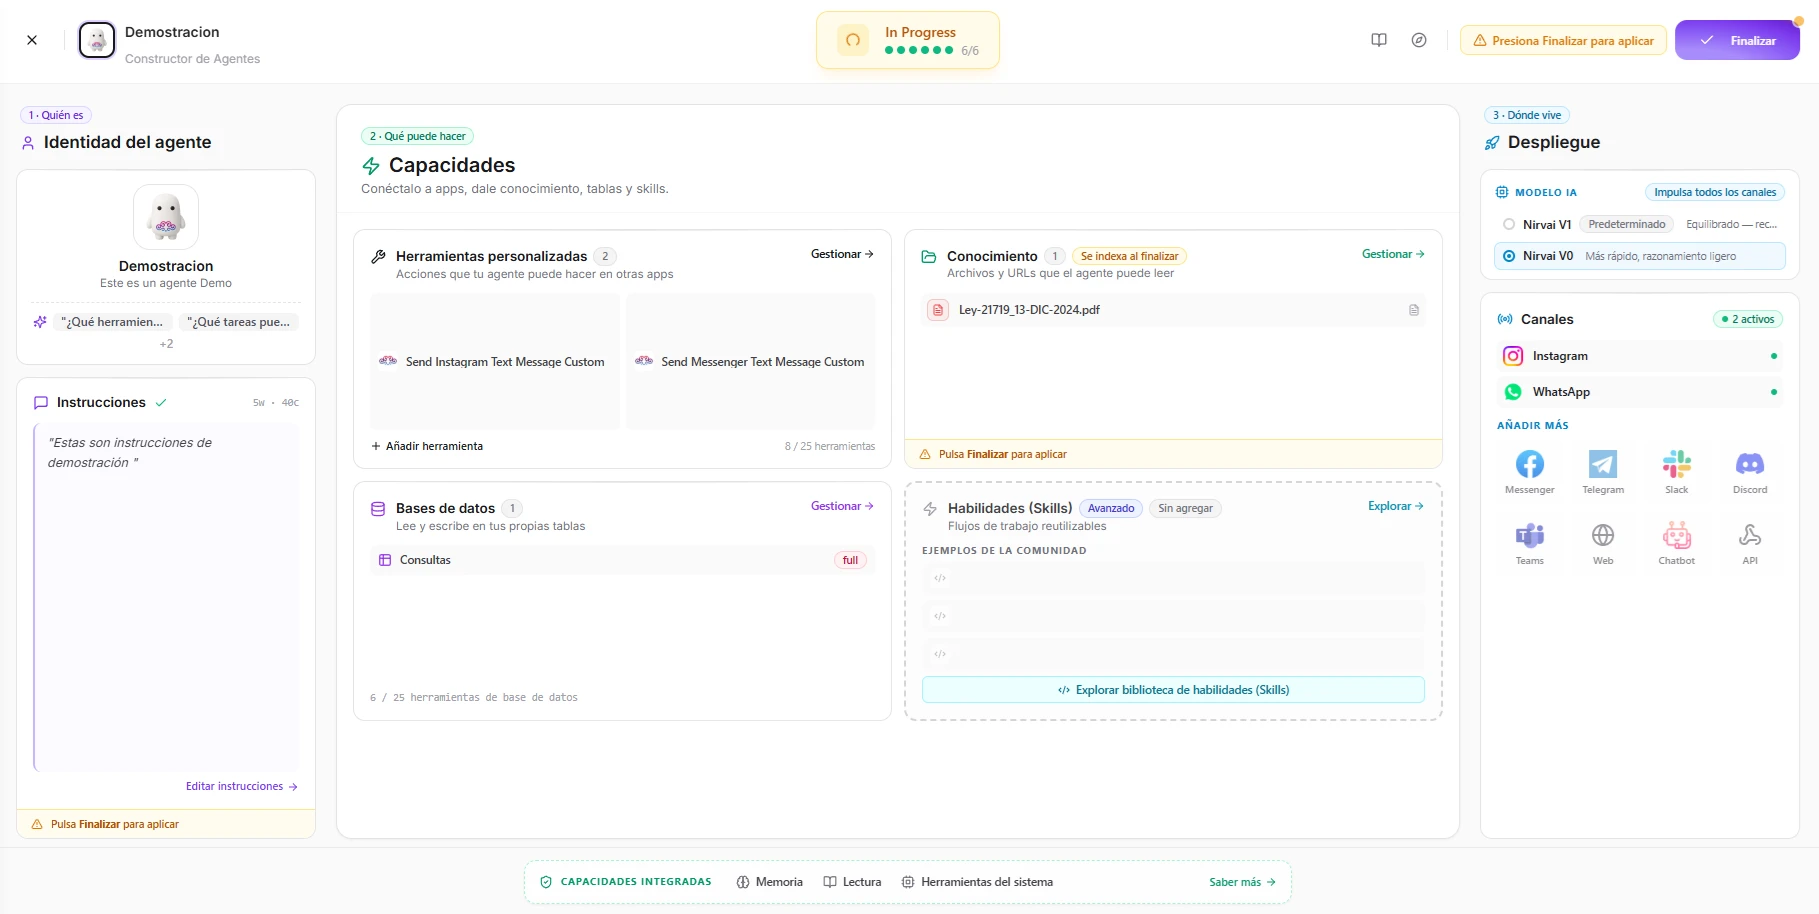 Image: The agent builder with a configured agent — a name and starters in Identity, tools, knowledge, and a database in Capabilities, and two live channels in Deployment
Each step, one by one
Here's what every step does in a sentence, with a link to its full guide. Only the profile has to come first — after that, work through them in any order.
Set the name, description, avatar, AI model, and conversation starters. Saving this is what creates your agent and unlocks the rest.
Open guideDefine your agent's personality, tone, and the rules it follows in every reply.
Open guideGive your agent actions it can take in other apps — send a message, create a record, and more.
Open guideUpload files and URLs your agent can read and cite when it answers.
Open guideConnect your own tables so the agent can read and write data, with per-table permissions.
Open guideAdd reusable, repeatable workflows for advanced tasks that need consistent results.
Open guideDeploy your agent to WhatsApp, Instagram, Slack, your website, and more.
Open guideReview everything and publish your agent so it's ready to chat and answer on its channels.
Open guideTracking your progress
A progress badge at the top of the screen counts how many of the six core sections you've set up. It moves from Building while you're still filling things in, to In Progress once you've covered the essentials. When you've made changes that aren't live yet, the builder prompts you to press Finish to apply them.
Pressing Finish reviews everything and publishes your agent so it's ready to chat and answer on its channels.
What's next
Start at the beginning and work through the steps in order, or jump straight to the area you care about.
Step 1: Profile
Name, description, avatar, and the model that powers your agent
Instructions
Shape your agent's personality, tone, and the rules it follows
Tools & Knowledge
Give your agent actions to take and documents to reference
Deploy to Channels
Connect your agent to WhatsApp, Slack, your website, and more