Step 1: Profile
Setting up your agent's profile is like filling in the badge a new employee wears on their first day: it tells everyone who this agent is and what it's here to help with. The profile is the first step when you create an agent, and it covers the name, description, and picture that people see when they start a chat. A clear profile helps people know what the agent does before they even send a message.
Before you start
- You don't need anything saved yet — this is the very first step of creating an agent.
- Have a short, clear idea of what this agent is for (for example, "answering product questions" or "qualifying sales leads"). You'll write that into the name and description.
Step-by-step
- Open the agent creation canvas and click the Profile node.
- Fill in the fields below.
- Click Save to create your agent.
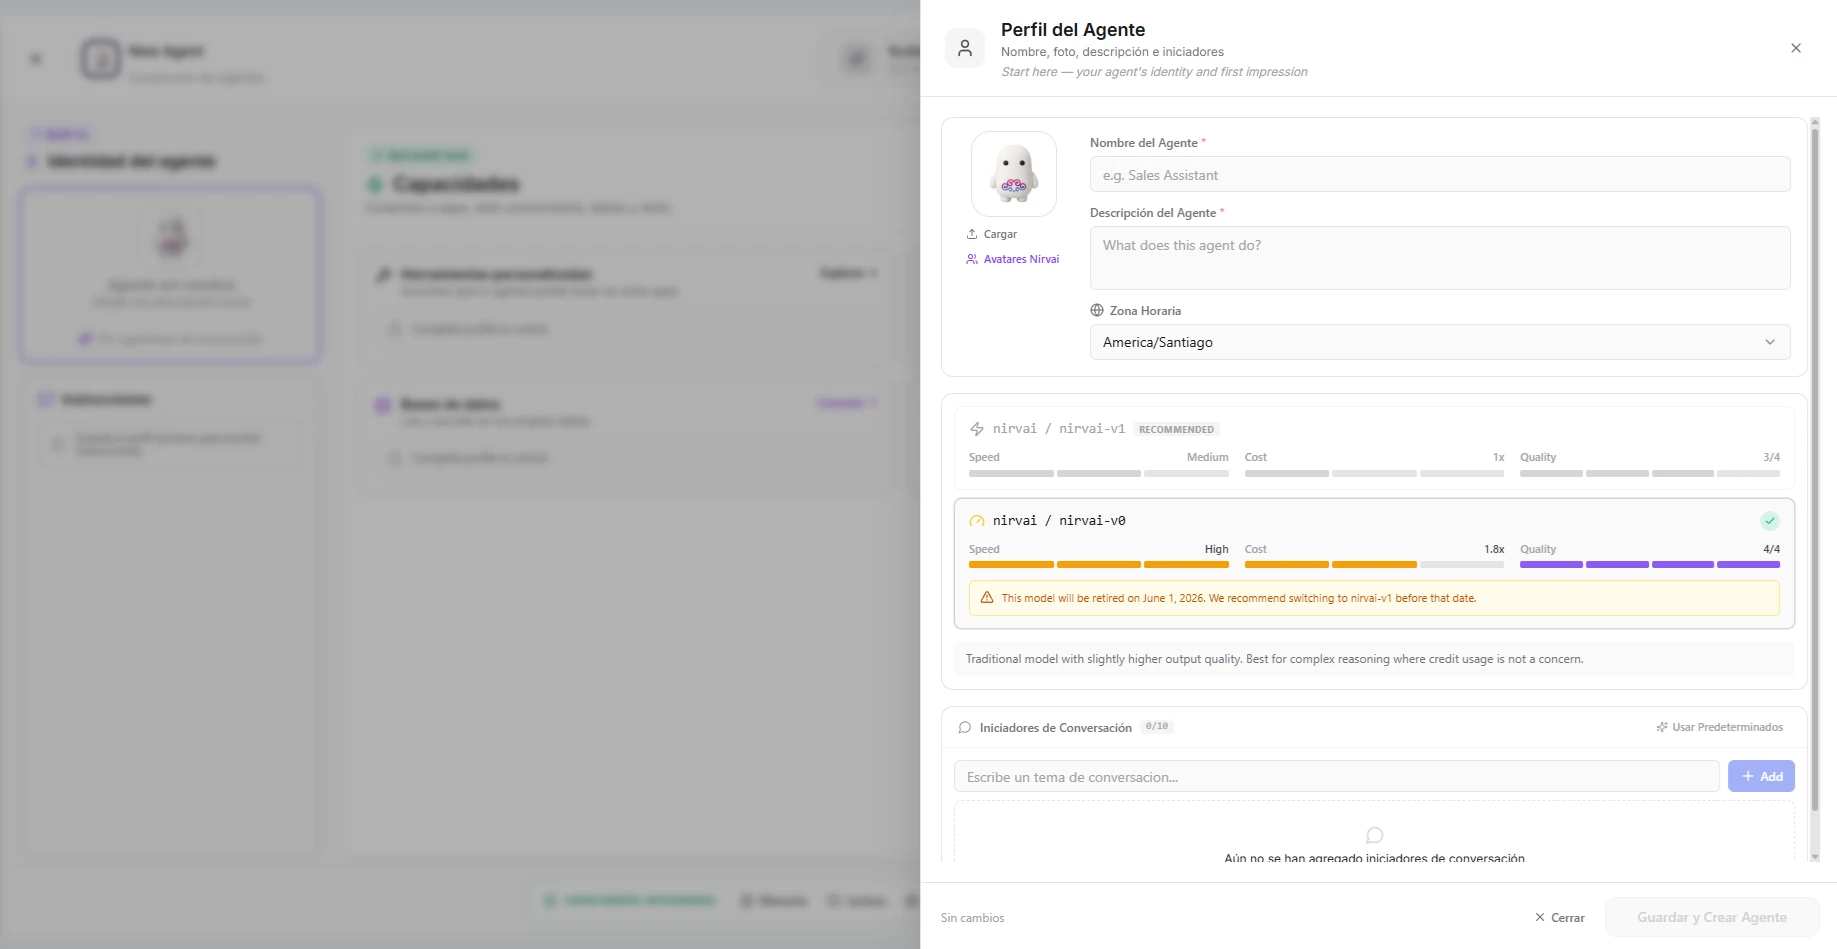 Image: The profile step showing name, description, and avatar fields on the creation canvas
What you fill in
| Field | Required | What it does |
|---|---|---|
| Name | Yes | The agent's display name (for example, "Sales Assistant" or "Support Bot") |
| Description | Yes | A short explanation of what the agent does. Shown on the agent card and in channel greetings |
| Avatar | No | A picture that represents the agent. If you leave it blank, Nirvai creates one for you automatically |
| Model | Yes | The AI model your agent runs on. Different models vary in what they can do, how fast they respond, and how much they cost |
Writing a good name
Your agent's name shows up everywhere — in chat headers, channel messages, automation steps, and the Agent Control Panel (where you manage all your agents). Make it descriptive so you and your users can tell agents apart at a glance:
| Good names | Why |
|---|---|
| Sales Qualifier | Makes the purpose clear |
| Product FAQ Bot | People know what to ask |
| Onboarding Guide | Describes the interaction |
| Avoid | Why |
|---|---|
| Agent 1 | Gives no hint of what it does |
| Bot | Too generic |
| My AI | Unhelpful in a list of agents |
Writing a good description
The description does two jobs:
- For your users — it appears as the greeting or context in chat and channel messages.
- For you — it reminds you what the agent is for when you're juggling several of them.
Keep it to one or two sentences. Focus on what the agent does and who it's for:
"Answers customer questions about our product features, pricing, and availability. Trained on our latest product catalog and FAQ."
"Qualifies inbound leads by researching their company and deciding whether they're a good fit. Uses web search and our CRM data."
Choosing an avatar
The avatar gives your agent a face. It shows up in:
- The Agent Control Panel grid
- Chat conversations
- Channel messages (WhatsApp, Instagram, and others)
- Automation step cards
You can upload any image (PNG or JPG). If you skip this, Nirvai creates a default picture based on the agent's name.
When you have several agents, give each one a distinct avatar. It makes them far easier to spot at a glance in the Agent Control Panel and when you're building automations.
Behavior
The Profile step has one behavior toggle, in a Behavior section just below the model. It's on by default — you only need to touch it if you want a plainer, text-only agent.
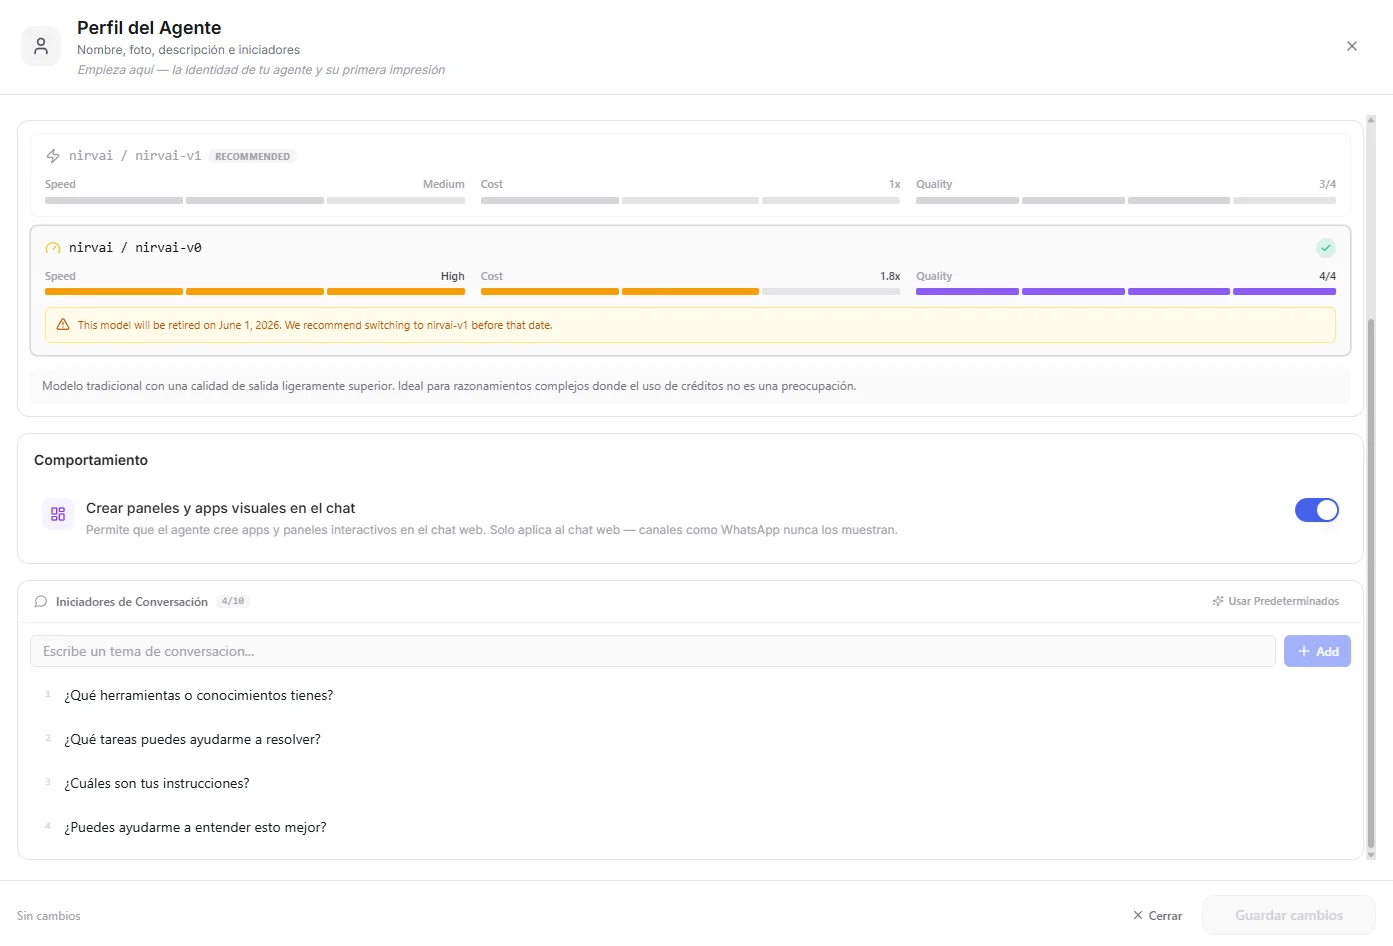 Image: The Behavior and Conversation Starters sections in the Profile panel
| Toggle | What it does | Leave it on for | Turn it off for | Default |
|---|---|---|---|---|
| Display apps | Lets the agent build interactive apps and dashboards inside the web chat. | Agents used in the web chat that benefit from visuals — charts, tables, mini tools. | Agents that only ever reply in plain text. | On |
Display apps only applies to the web chat. On channels like WhatsApp, Instagram, or Slack, agents always reply with plain messages and never show apps or dashboards — regardless of this toggle.
Conversation starters
Conversation starters are like the suggested questions a hotel concierge prints on a card by the front desk — they show newcomers what they can ask without having to figure it out from scratch. They're ready-made prompts that appear as clickable buttons when someone opens a chat with your agent, set right inside the Profile step. They're optional — add them now or come back later.
Why they help:
- They show off what the agent can do at a glance.
- They save effort — one click instead of typing.
- They point people toward the things the agent handles best.
Adding starters
- In the Conversation Starters section of the Profile step, type a prompt and click Add — or click Use defaults to start from suggested ones.
- Add three to five distinct prompts. The text you write is exactly what gets sent when someone clicks it.
Example starters by agent type
| Agent | Starters |
|---|---|
| Customer support | "What's the status of my latest order?" · "I'd like to request a return" · "What are your business hours?" |
| Research | "Summarize the latest news about [topic]" · "Compare [product A] vs [product B]" |
| Sales | "Tell me about your pricing plans" · "I'd like to schedule a demo" |
Tips for good starters
| Do | Don't |
|---|---|
| Use natural, conversational language | Use robotic or overly formal phrasing |
| Cover the agent's main uses | Add starters for things the agent can't do |
| Keep prompts short (under 60 characters) | Write paragraph-length starters |
| Include 3–5 starters | Add more than 6 (too many choices means no choice) |
Think about the top three to five things people will most commonly ask your agent, and turn those into starters. They show up in Nirvai Chat and the web chat widget — not on channels like WhatsApp, where people start conversations freely.
Troubleshooting
| Problem | Fix |
|---|---|
| The Save button stays greyed out | Make sure the Name, Description, and Model fields are all filled in — they're required. |
| My uploaded picture won't appear | Use a PNG or JPG file. If it still doesn't show, try a smaller image or refresh the page and upload again. |
| I picked the wrong model | You can change the model anytime — reopen the Profile step, pick a different one, and save. |
| I turned Display apps off but my WhatsApp agent never showed apps anyway | That's expected — display apps only ever appear in the web chat. Channels like WhatsApp always reply in plain messages, so the toggle makes no difference there. |
| My conversation starters don't appear in the chat | Starters only show in Nirvai Chat and the web chat widget, not on channels like WhatsApp where people start conversations freely. |
What's next
After you save your profile, click the Instructions node on the canvas to continue to Step 2: Instructions.
Saving the Profile step creates your agent. From here on, each step saves on its own — you can move between nodes freely and your work is kept.