Managing Your Agents
The Agent Control Panel is like the front desk of an office where all your agents work — one place to check on each one, make changes, see who they have been talking to, and assign them to new jobs. From here you can edit an agent's setup, review its conversations, organize your library, and share agents with your team.
Before you start
- At least one agent created in the Agent Control Panel. If you have not made one yet, start from Using an Agent Template.
The agent grid
The main view shows all your agents as cards in a grid. Each card displays:
| Element | What it shows |
|---|---|
| Avatar and name | The agent's identity |
| Description | What the agent does |
| Status | Active (green), In Progress (amber), or Error (red) |
| Connected channels | Icons showing where the agent is published |
| Tool count | How many tools are turned on |
| Database connections | The databases linked to the agent |
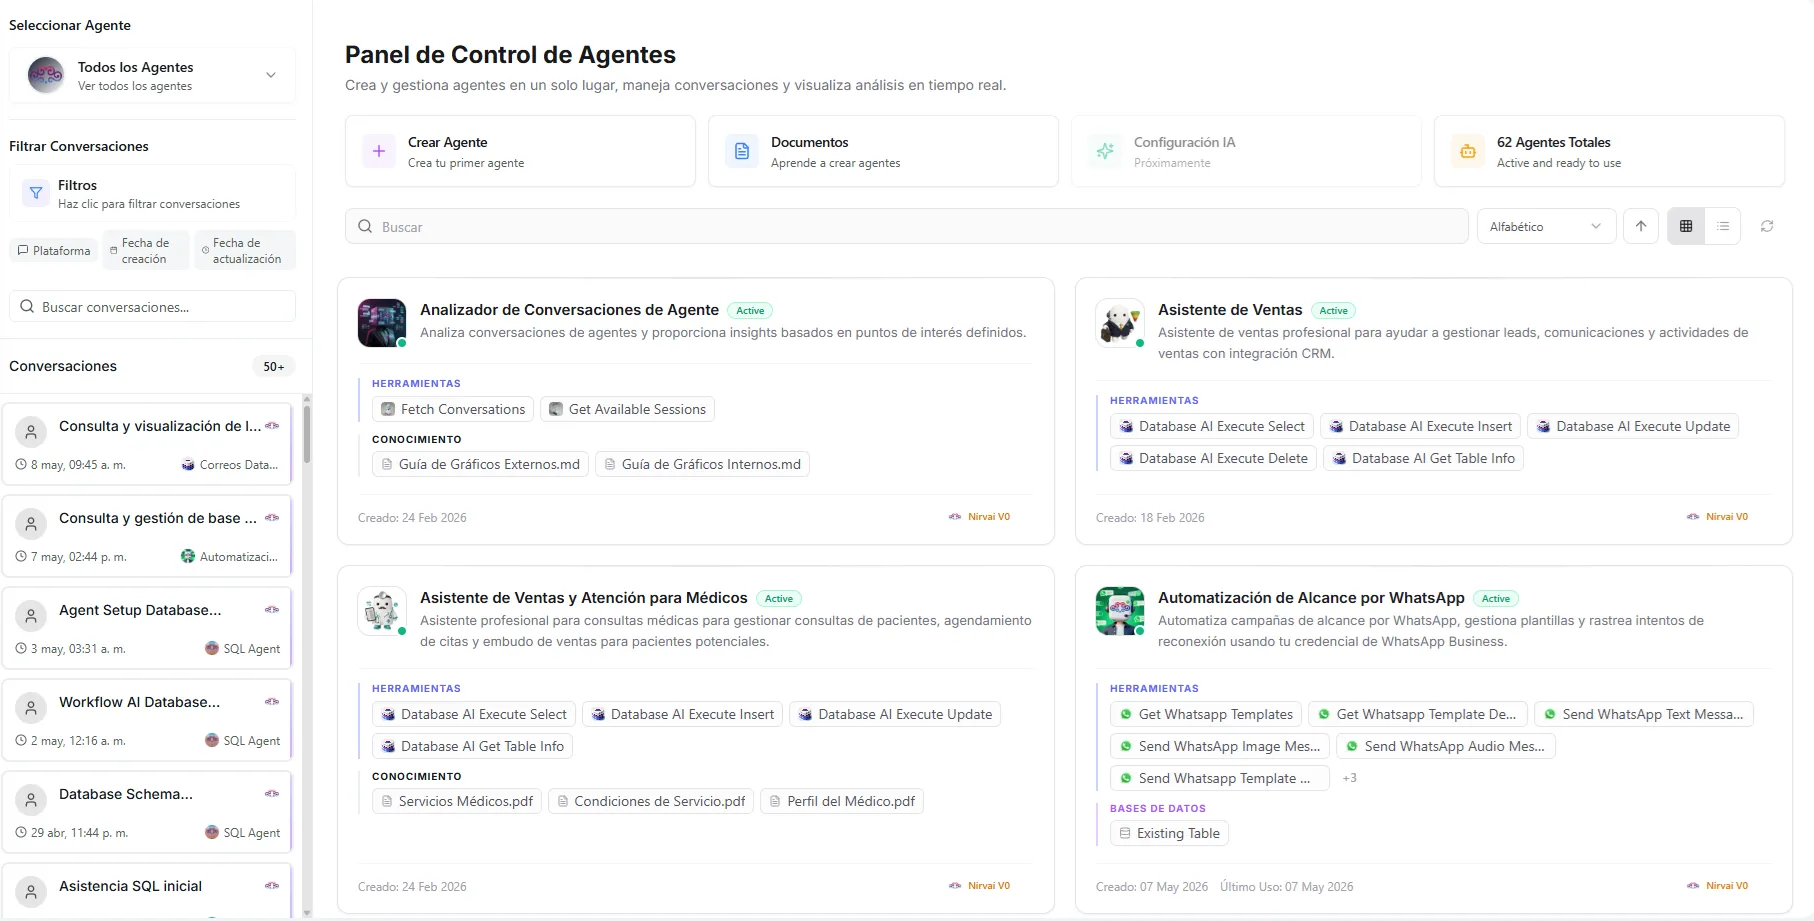 Image: The Agent Control Panel grid showing agent cards with status indicators and channel icons
The agent detail page
Click any agent card to open its detail page. Here you see the full setup at a glance — profile, tools, knowledge base, instructions, connected channels, and more.
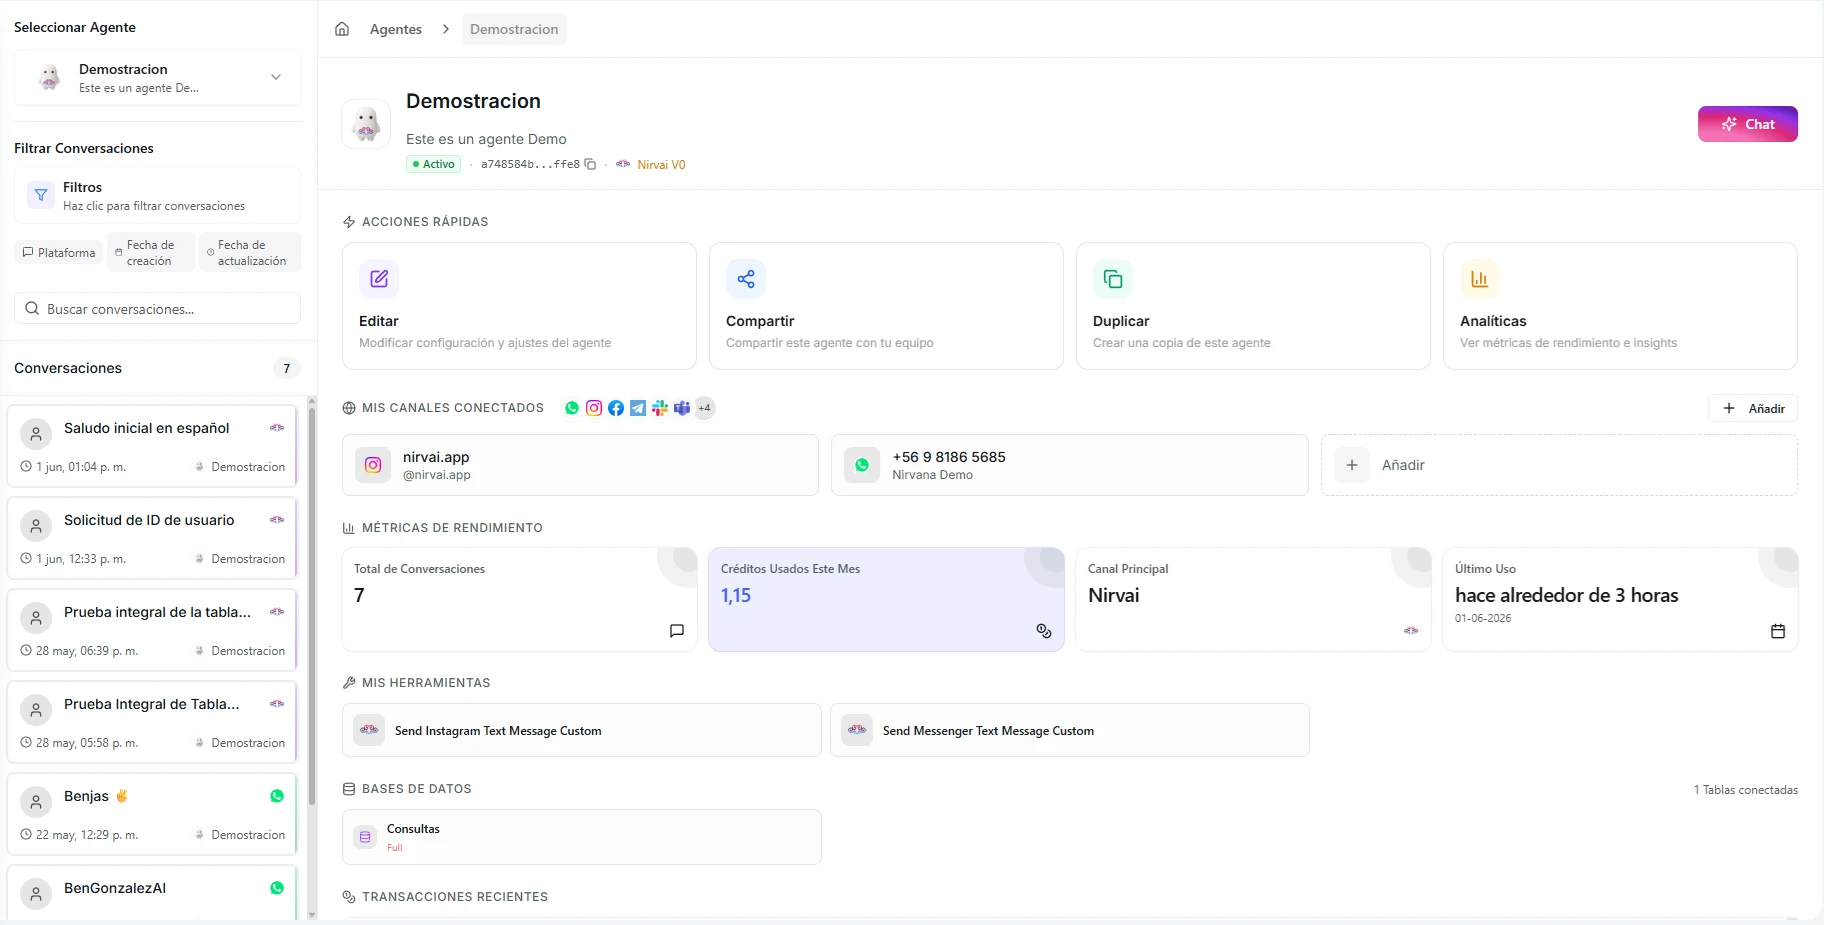 Image: The agent detail page showing the full agent configuration
Editing an agent
- Click any agent card and select Edit to reopen the creation flow.
- Move through any of the nine steps — Profile, Conversation Starters, Instructions, Tools, Knowledge Base, Databases, Skills, Channels, and Finish.
- Save your changes.
Changes take effect right after you save. If the agent is published to channels, people will talk to the updated version on their next message.
Adding or removing knowledge base files starts a short re-processing step. Your agent keeps working with the old files while the new ones are being read.
Chatting with your agent
Click Chat on any agent card to open a test conversation in Nirvai Chat. This is the main way to:
- Test new agents before you publish them.
- Check changes after editing.
- Track down unexpected behavior.
- Show the agent to teammates.
Chats you start in the Control Panel are separate from channel conversations, so you can run as many test chats as you like without affecting people using the published agent.
Duplicating an agent
To make a copy of an existing agent:
- Click the agent card menu.
- Select Duplicate.
- A new agent is created with the same setup (name, instructions, tools, starters).
- The copy opens in edit mode so you can rename it and adjust settings.
Duplicating is handy when you want variants of an agent — for example, a "Sales Agent (English)" and a "Sales Agent (Spanish)" with different instructions but the same tools.
Duplicating copies the setup but not the conversation history. Skills, database connections, and knowledge base files are all copied to the new agent.
Monitoring conversations
You can review the conversations your agent has had across every channel:
- Open the agent in the Control Panel.
- Go to the conversation history view.
- Browse conversations by channel, date, or user.
This helps you:
- Spot common questions users ask (so you can improve instructions or add knowledge).
- Catch issues in the agent's answers.
- Understand how people actually use the agent.
- Track how much it is being used across channels.
Deleting an agent
Click the agent card menu and select Delete. This:
- Removes the agent from the Control Panel.
- Disconnects it from all channels.
- Deletes its knowledge base and setup.
If the agent is used in any automations, you will be warned first. Removing it will affect those workflows — they will no longer be able to run the steps that rely on this agent.
Deleting is permanent. There is no undo. Make sure you really want to remove the agent before you confirm — especially if it is used in active automations.
Agent statuses
| Status | What it means | What to do |
|---|---|---|
| Active (green) | Fully set up and ready to use | Nothing — it is working normally |
| In Progress (amber) | Has unsaved changes or an unfinished setup | Finish the setup |
| Error (red) | Something went wrong during setup | Read the error message and fix the issue |
Sharing across your organization
If you are part of an organization, you can share any agent you own with your whole team. Flip one switch and every member can use and edit the agent — while you stay the only one who can delete it or turn sharing back off. Shared agents can also be called on by shared automations.
See Sharing Your Agents for the full walkthrough — how to share, what your team sees, and which conversations stay private.
Best practices
| Practice | Why |
|---|---|
| Test after every edit | Chat with your agent after changing instructions, tools, or knowledge to confirm the change works |
| Use descriptive names | "Sales Qualifier — English" beats "Agent 3" once you have many agents |
| Review conversations regularly | Real interactions reveal gaps you won't find in testing |
| Start with fewer tools | Add tools as you need them instead of turning everything on at once |
| Keep instructions focused | One well-defined agent beats one overloaded agent trying to do everything |
| Use templates for new agents | Templates give you a tested starting point — customize from there |
Troubleshooting
| Problem | Fix |
|---|---|
| My edits don't show up for users on a channel | Changes apply on the user's next message — they won't change a reply already in progress. |
| The agent shows an amber In Progress status | It has unsaved changes or an unfinished step. Open it, complete the setup, and save. |
| The agent shows a red Error status | Open the agent and read the error message — it points to the step that needs fixing. |
| I can't delete an agent without a warning | The agent is used in one or more automations. Deleting it will break those steps, so update or remove them first. |
| My duplicated agent has no past conversations | That is expected — duplicating copies the setup but not conversation history. |
What's next
- Using Developer Mode — debug and improve an agent just by chatting with it.
- Skills — add advanced abilities to an agent.