Settings
Organization
Manage your team — invite members, assign admin roles, and share your license code
The Organization tab is only visible to organization admins. If you don't see it in your Settings sidebar, ask your admin for access or to make changes on your behalf.
An organization in Nirvai is like a company account that your whole team shares — everyone works under the same roof, drawing from the same agents, automations, databases, and pool of credits. You invite your team, and you all work together in one shared workspace.
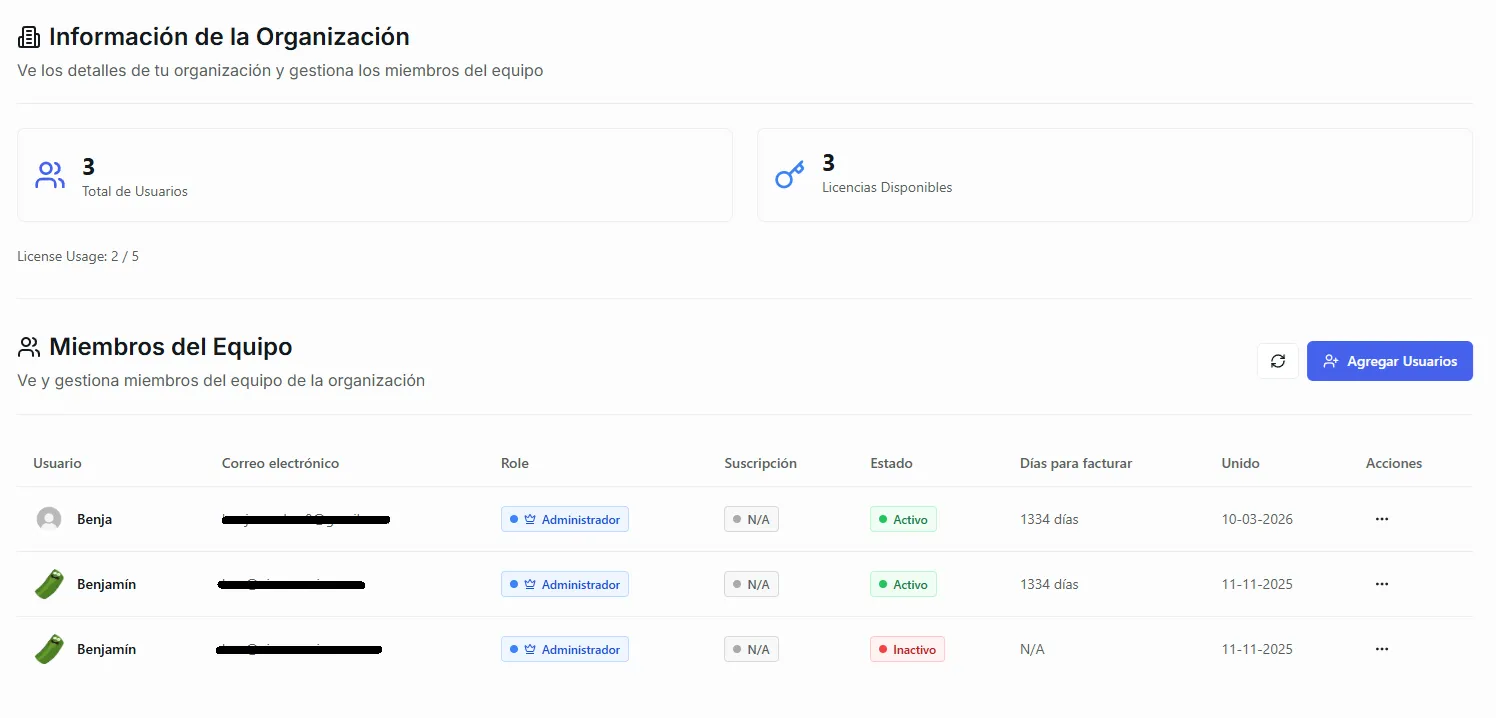 Image: The Organization tab showing the team overview and member list
Organization Overview
At the top of the Organization tab you'll see a summary of your workspace:
| Field | Description |
|---|---|
| Organization name | The name of your workspace |
| Logo | Admins only. Shown across the app and at the top of the emails your web chat pages send. PNG, JPG, GIF or WebP, up to 5 MB — you can also add it while setting up your account |
| Total licenses | How many seats your subscription includes |
| Remaining licenses | How many more people you can invite |
| License code | A unique code that new members use to join |
Inviting Team Members
There are two ways to bring people into your organization:
Option 1: Share the License Code
- Go to Settings > Organization
- Find the License Code section
- Click the Copy button to copy the code to your clipboard
- Send the code to your teammate (via email, Slack, etc.)
- Your teammate enters the code when creating their Nirvai account or from their account settings
Option 2: Share the Invite Link
- Click the Share button next to the license code
- A shareable link is generated that your teammate can open in their browser
- The link takes them through the sign-up flow with your organization pre-selected
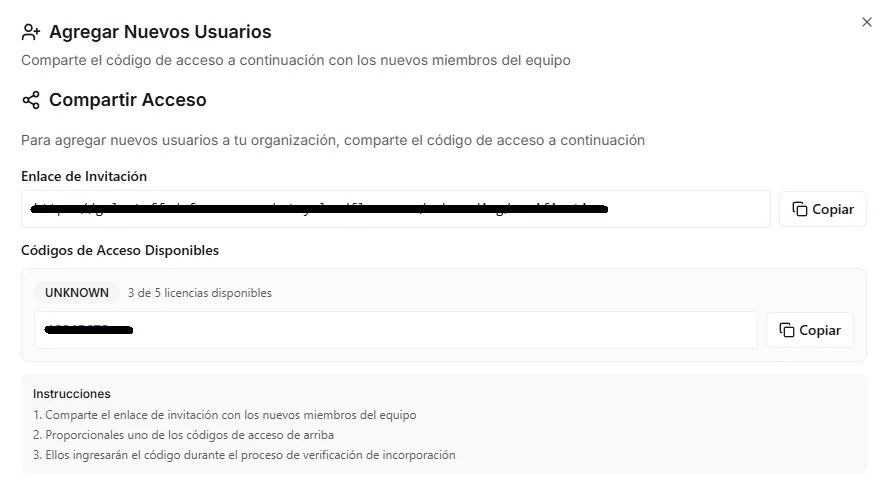 Image: The license code section with copy and share buttons
Each license allows one person to join. If you've used all your licenses, you can upgrade your subscription for more seats, transfer a seat to a new person, or delete a member you no longer need to free their seat. (Inactivating a member keeps their seat assigned.)
Managing Team Members
The member table shows everyone in your organization with their role, status, and join date.
| Column | Description |
|---|---|
| Name / Alias | The member's display name |
| Their email address | |
| Role | Admin or Member |
| Subscription | Their plan type and status |
| Joined | When they joined the organization |
Promoting a Member to Admin
Admins can manage billing, organization settings, and see all team usage data. To promote a member:
- Find the member in the table
- Click the three-dot menu (⋮) on their row
- Select Promote to Admin
The member will immediately gain access to the Organization and Billing tabs.
Demoting an Admin to Member
If you need to revoke someone's admin access:
- Find the admin in the table
- Click the three-dot menu (⋮) on their row
- Select Demote to Member
They'll lose access to the Organization and Billing tabs but can still use all other features.
Member actions
Beyond the role controls above, each member's three-dot menu (⋮) has three actions for managing access over time: Inactivate, Transfer, and Delete.
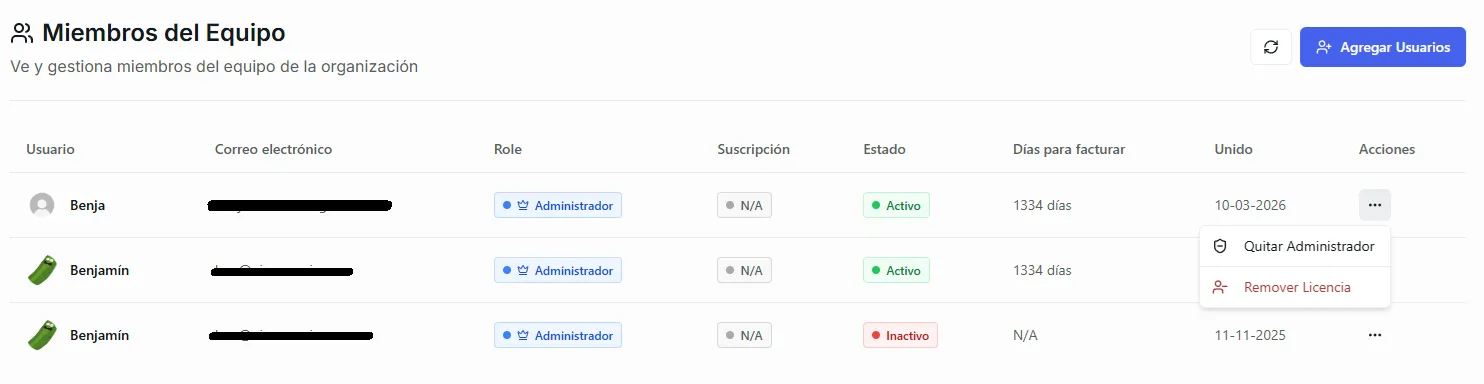 Image: The member table with the action menu open
Inactivate
Blocks a member from signing in while keeping all of their work untouched — nothing is deleted and their seat stays assigned. Their status shows as Inactive, and if they try to log in they'll see a message that their account has been deactivated. It's fully reversible: pick Reactivate from the same menu. Use it to pause access for someone who's away or between contracts.
Transfer
Hands a member's seat to a different person in place, keeping everything the seat owned. You enter the new person's name, email, and a starting password; they can sign in right away, and all of the previous member's chats, records, and agents are inherited by the new person. Use it when a replacement takes over someone's exact role and data.
Delete
Permanently removes a member and everything they own — agents, databases, automations, documents, files, and chats — and frees their license seat. This cannot be undone.
Before you confirm, Nirvai shows an itemized preview of what will be removed — the member's agents and databases listed by name, plus counts of their documents, files, and chats — so you always know exactly what you're deleting.
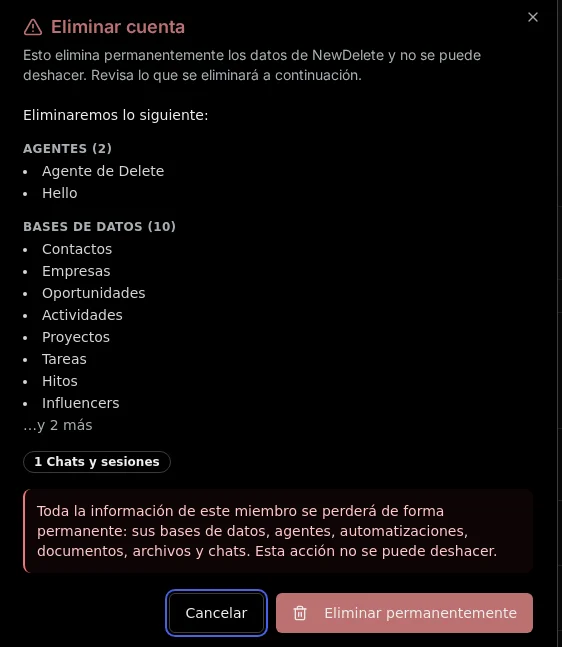 Image: The delete confirmation listing the agents, databases, and content that will be removed
Deleting a member erases their agents, databases, automations, documents, files, and chats for good. If you only need to stop someone from logging in, use Inactivate instead.
Your organization's credit and usage history is kept for your records, and a deletion never changes payments with your billing provider — reconcile those manually.
Roles Explained
| Role | What They Can Do |
|---|---|
| Admin | Everything a member can do, plus: manage billing, buy credits, invite/remove members, promote/demote roles, see organization-wide usage |
| Member | Create and use agents, automations, databases, and channels. See their own usage data. Cannot access billing or organization management |
Common Questions
How do I know if I'm an admin? If you can see the Organization and Billing tabs in Settings, you're an admin. Members only see General, Configuration, and Usage.
How many admins can an organization have? There's no limit. You can promote as many members to admin as you need.
What happens to a member's agents when they leave? It depends how you remove them. Inactivate and Transfer keep all of their agents and other work in the organization. Delete permanently erases everything they own — so if a replacement needs their agents, use Transfer instead.
Can a member leave the organization on their own? Currently, only admins can manage members. If a member wants to leave, they should ask an admin to inactivate, transfer, or delete their seat.
I ran out of licenses but need to invite one more person. What do I do? Free a seat by transferring it to the new person or deleting a member you no longer need, or upgrade your subscription from the Billing tab to get more seats. Inactivating a member does not free their seat.
Does each member get their own credits? No. Credits are shared across the entire organization. See Credits for details on how the shared credit pool works.
What's next
- Credits — how the shared credit pool works across your team
- Sharing Your Agents — make an agent available to everyone on your team